How to Test your Soil:
Healthy plants start with healthy soil — Are some plants just not flourishing? Then check your soil quality and soil health. It may be short of certain nutrients. Discover how to easily test your soil and check the nutrient guide to spot which nutrients may be lacking , with tips to understand your soil health and fixes to help improve your soil..
How to Test & Understand your Soil – You need to know your soil!
Soil is more than just dirt beneath our feet. It’s the lifeblood of a garden — providing plants with water, air, and nutrients. Understanding your soil type is the very first step to creating a thriving garden, no matter how big or small.
I have learnt the hard way about how important the quality and health of the soil is. I have lost many, many, countless plants! Also so much time and hard effort and let’s not mention the cost! So yes – Soil Quality and health is truly essential for your garden! I have spent a lot of time working through the various soils in the gardens and have compiled a list of things to do and look out for to help you understand what sort of soil you have. So let’s discuss the first steps to take to get to know your soil – How to test your soil?
Introduction – What is soil quality or soil health?
We often hear the terms soil quality and soil health. They sound similar, but they describe slightly different things:
Soil quality refers to the physical, chemical, and biological properties of the soil that affect how well it supports plant growth. This includes texture (clay, sand, loam), pH, drainage, organic matter, and nutrient levels. In simple terms, soil quality is about how suitable the soil is for growing what you want.
Soil health looks at the soil as a living system. Healthy soil is full of microorganisms, fungi, worms, and organic matter that interact to keep nutrients cycling, improve structure, and resist problems like erosion or compaction.
Why does this matter for your garden? Because soil isn’t just “dirt.” It’s the foundation for every plant you grow. Poor soil quality can mean stunted plants, yellowing leaves, or wasted fertilizer, while healthy soil brings better harvests, successful planting, more resilient plants, and less work for you over time.
How to Test Your Soil – Different ways to test your soil:
Here are some simple and easy DIY Soil Tests to help you understand the sort of soil you have in your garden, because sometimes it’s just not completely obvious. You don’t need fancy equipment for most of them. Some I have done and others I have researched and I list all my research and discoveries below. Please consider your local conditions before applying any gardening methods or testing ideas – the results will depend upon your soil and method.
The Soil Squeeze Test
Soil Quality
Squeeze your soil – Does it roll and stick together , crumble easily or hold together a little?
The Soil Drainage Test
Simple Soil Drainage Test – How fast does water drain? If it’s fast it’s sandy soil, if it’s slow it might be heavier clay soil
The Soil Jar Test
Just how sandy is your soil?Sand, Silt or Clay? Try the jar test
Worm Count Soil Test
Soil Quality
A quick and natural way to check the life and health of your soil.
Soil Nutrients (NPK) Test
Discover what your soil is missing to help your plants thrive.
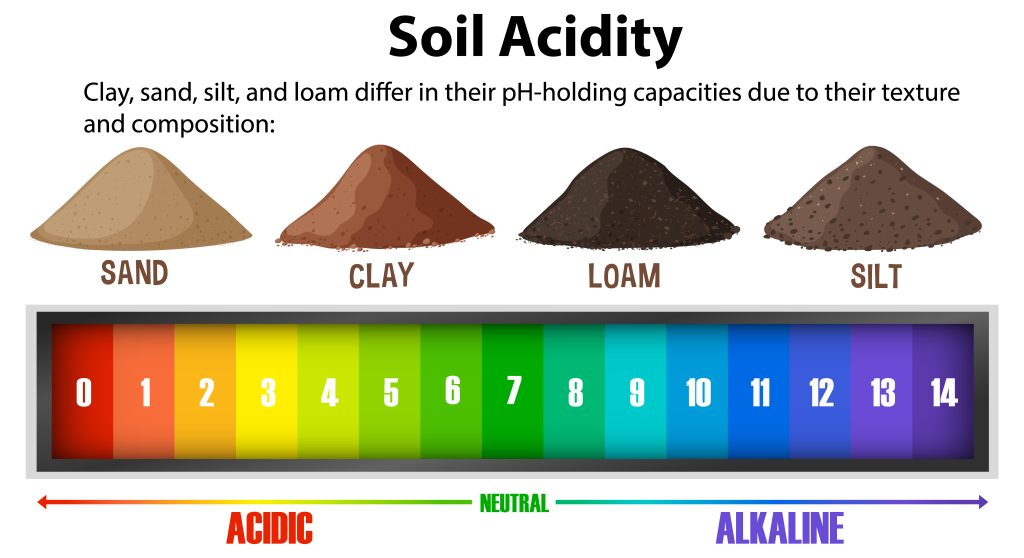
The Soil pH Test
Discover whether your soil is too acidic, too alkaline or just right for healthy growth
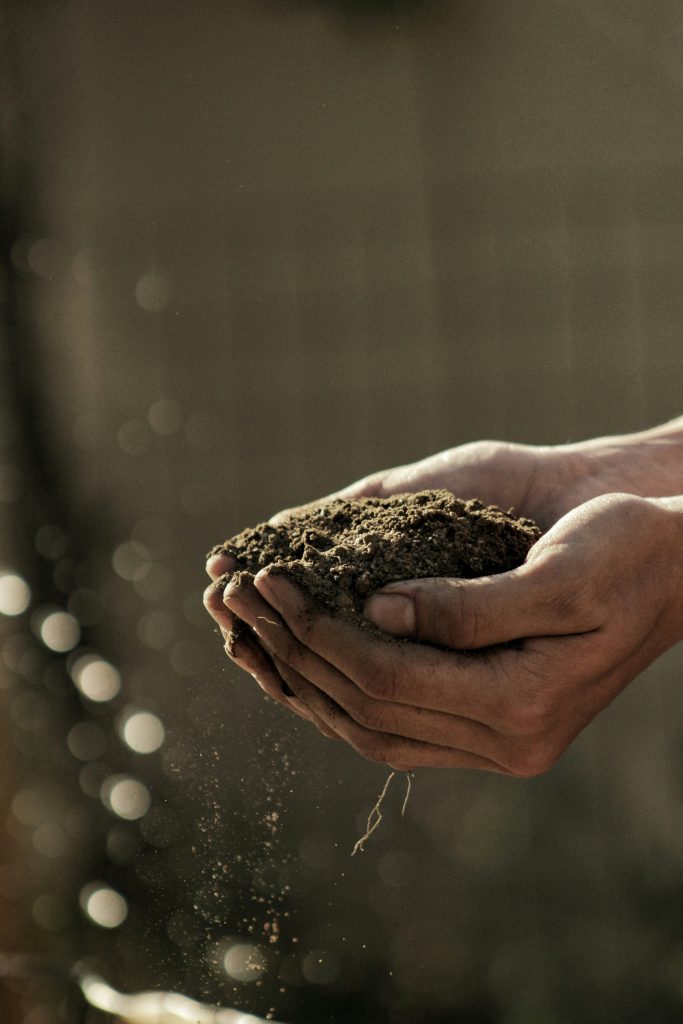
The Soil Squeeze Test – Easy DIY Soil Test!
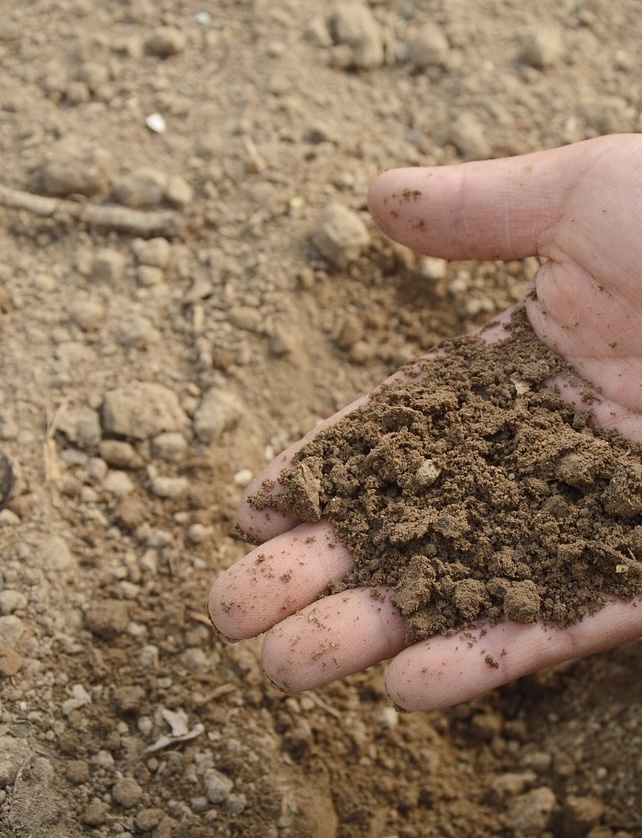
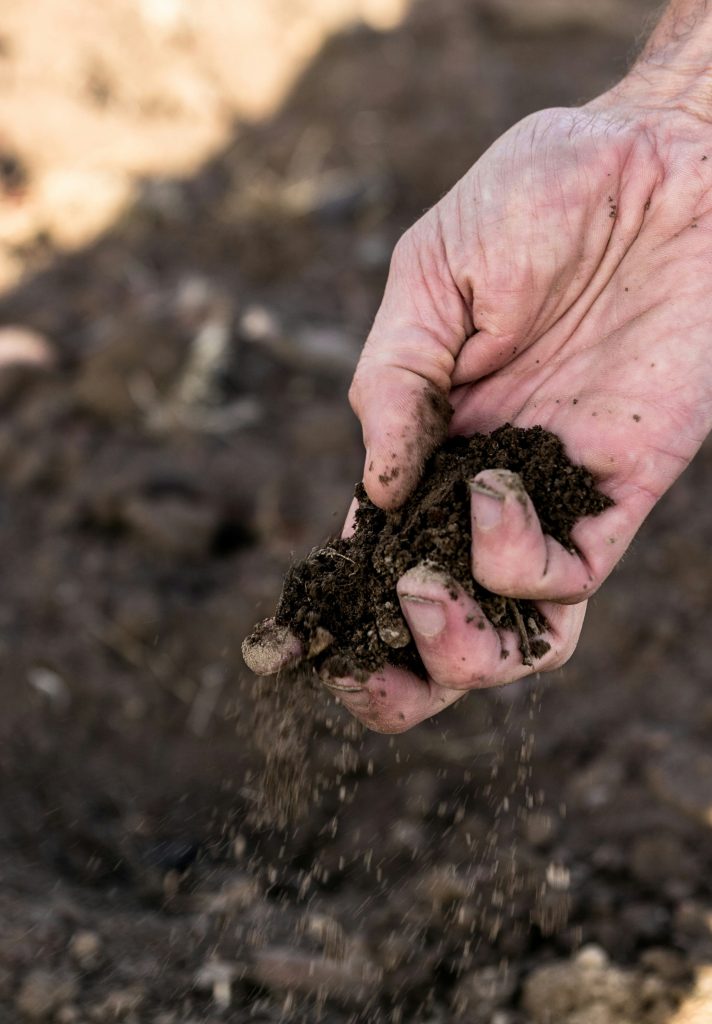
The soil squeeze test is by far the simplest and easiest way to get an idea of your soil’s texture and structure. To carry it out, take a small handful of slightly damp soil and squeeze it firmly in your palm – what happens?
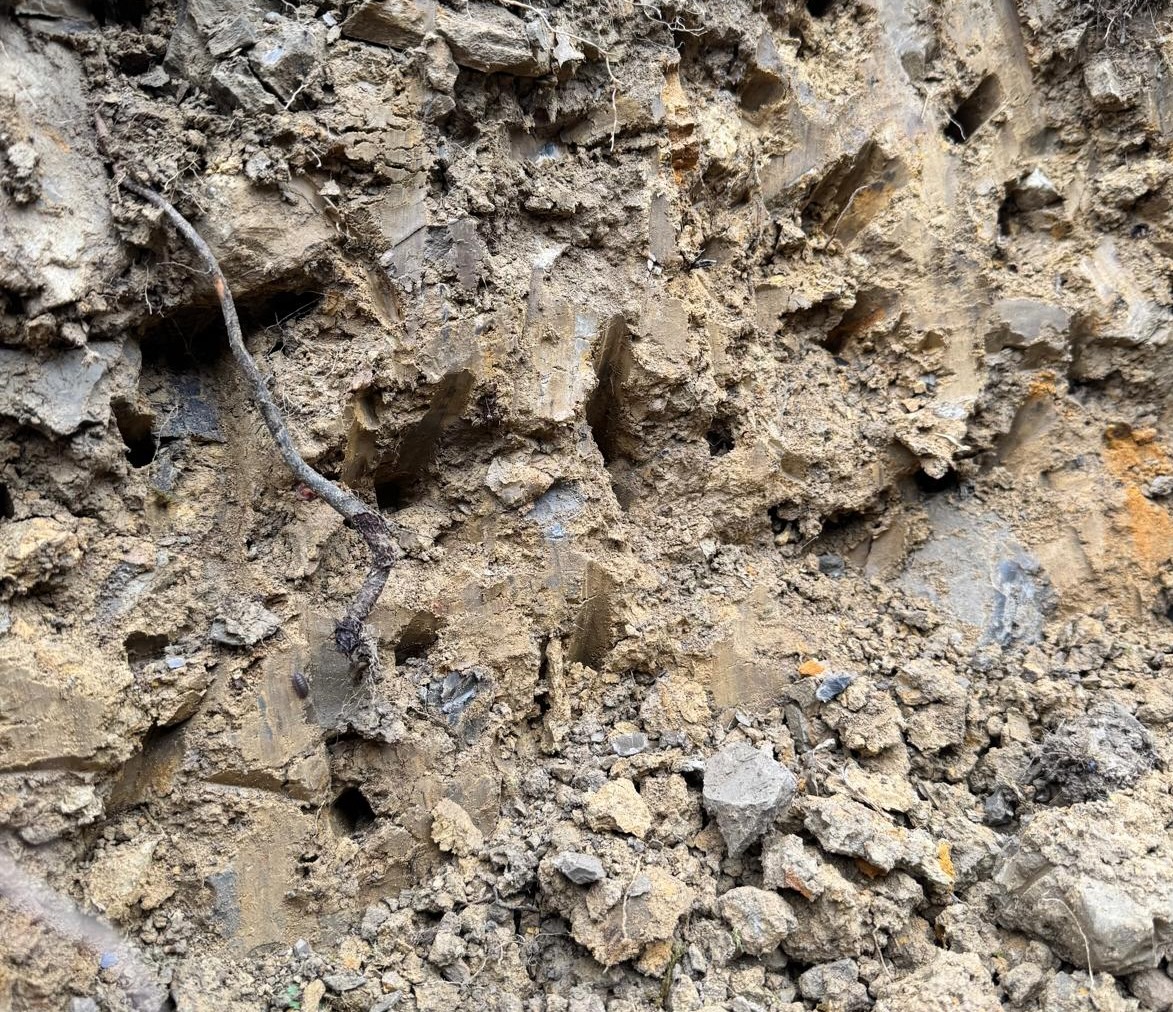
Clay Soil
If the soil forms a tight ball that holds its shape and feels slick or sticky, then it’s likely to be clay-rich soil, which holds water and nutrients well, but can easily become compacted and poorly drained. This soil is a dense and often a quite fine soil which retains water so well that it can lead to water logging. This, along with the fine nature of the soil, prevents little aeration within the soil, which leads to its heavy and compact nature. As a result roots cannot easily break into this compacted soil to access the nutrients. Even when clay soil dries out it is a very challenging soil because it cracks and forms hard layers.
Loamy Soil
If the soil forms a loose ball that crumbles easily when pressed, then it’s loam, which is really the ideal mix of sand, silt, and clay because it provides good drainage, moisture retention, aeration and allows plants to easily access the nutrients within the soil. ‘Loam’ means that it is a soil which is the most ideal for plant growth, because it is not too hard, wet, sandy or slimy, it is damp but not waterlogged which indicates ideal water retention and it crumbles easily which means that roots can easily grow and access the nutrients within the soil.
Sandy Soil
If it falls apart instantly and feels gritty, then it’s sandy soil, which drains very quickly and consequently tends to lose nutrients, dry out very quickly and is often subject to erosion.
Silty Soil
If the soil holds together only slightly and feels smooth or floury, it would possibly suggest silty soil, which retains moisture but can become dense and prone to erosion. By paying attention to how your soil behaves in your hand, you can quickly gauge its texture and decide whether you need to improve drainage, add organic matter, or adjust your watering habits.
Coming soon…
The Soil Drainage Test
Good drainage is vital for plant roots because it helps to prevent problems such as root rot or nutrient loss. It is also is essential for helping your plants to access the nutrients stored within the soil. But sometimes it is not that evident whether your soil is fast draining, offers in fact good drainage or in fact retains water too much which can lead to waterlogging.
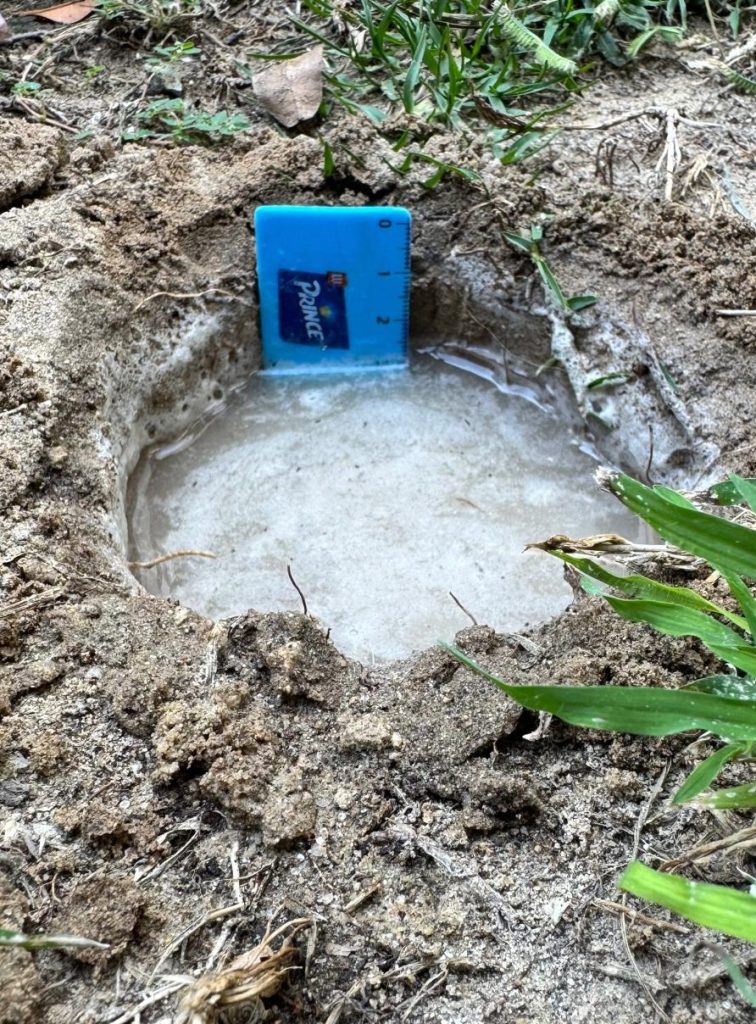
How to Test your Soil Drainage
To test your garden’s drainage, dig a hole about 30 cm (12 inches) deep and wide, fill it with water, and let it completely drain once. Then, refill it with water and time how long it takes for the hole to empty.
If the water drains away in under 30 minutes, the soil may be too sandy or porous, causing nutrients to wash away quickly and leaving plants thirsty.
If it takes more than four hours, the soil likely contains too much clay or is compacted, trapping water around roots and leading to poor aeration.
Ideally, the water should disappear within about one to two hours, showing that the soil has balanced drainage and good structure. This simple test reveals a lot about how water moves through your garden soil and whether you need to improve it with compost, grit, or other organic matter to create a healthier growing environment.
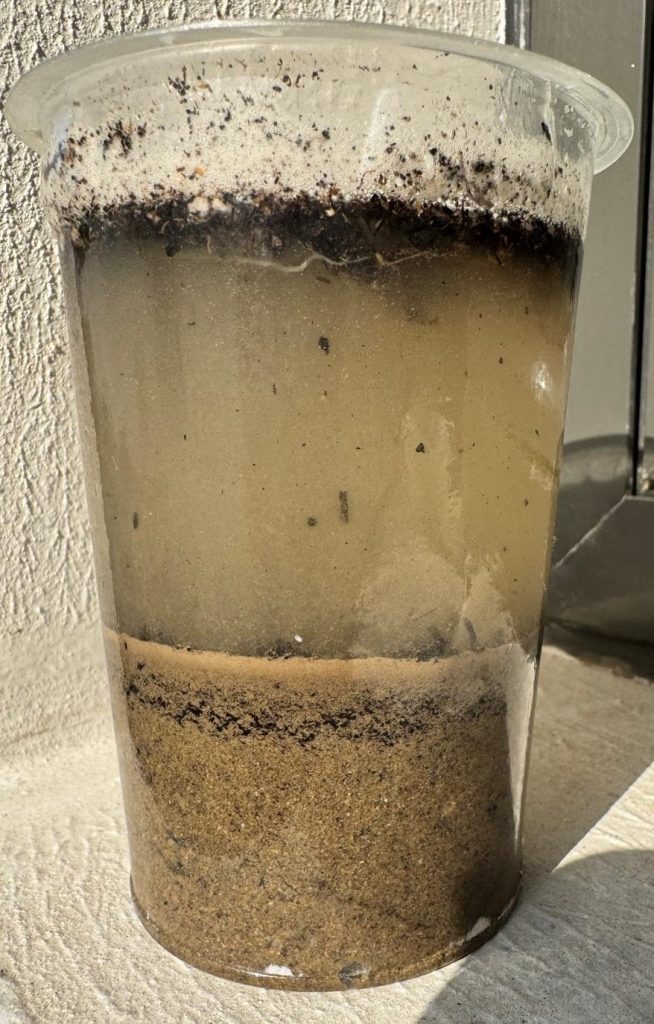
The Soil Jar Test
The soil jar test is another easy to do soil test which offers a fascinating visual way to understand more about your soil’s texture and makeup, because it separates the sand, silt, clay and organic matter. After a while you can easily see the proportions and components of your soil.
How to do the Soil Jar Test
This is an easy test to try, fill a clear jar about one-third full with dry soil, add water and a small drop of dish soap, then shake vigorously. Set the jar aside and watch as the soil particles settle over 24 to 48 hours.
The heaviest sand will settle first at the bottom, silt will form the middle layer, and the lightest clay will settle on top with organic matter floating.
Measuring each layer lets you estimate the percentage of each component and determine your soil type — for example, 40 % sand, 40 % silt, 20 % clay would be an ideal loamy soil.
The more clay present, the denser and slower-draining the soil will be, whereas sandy soils will have a thick bottom layer and need organic matter to retain moisture.
This test provides a clear visual snapshot of your soil’s structure, helping you understand how it behaves, how it holds nutrients, and what amendments might improve its performance.
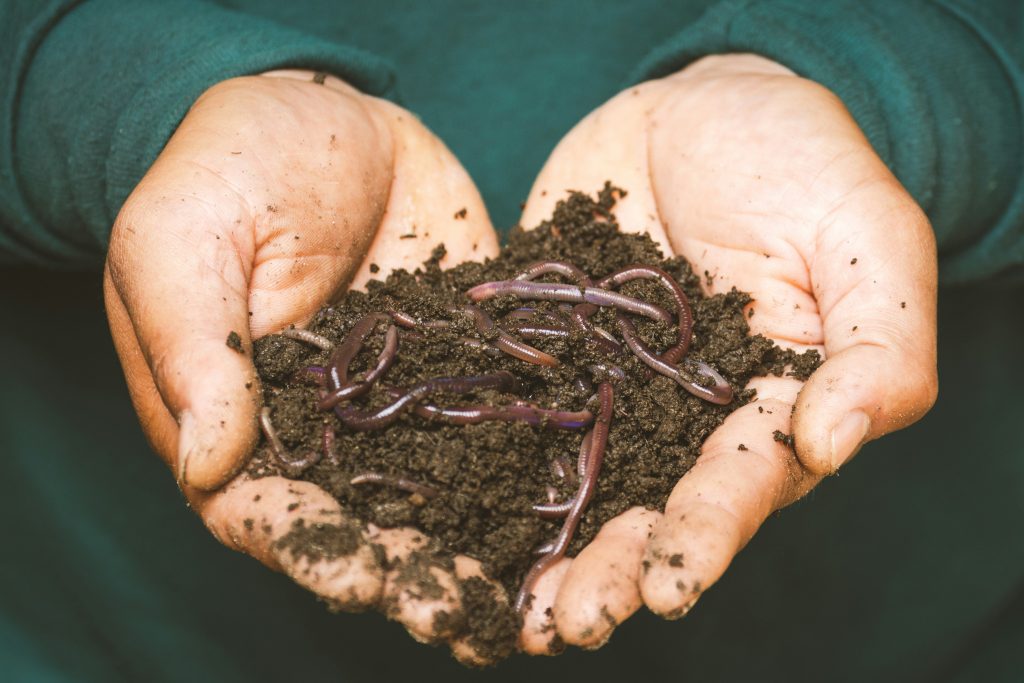
Worm Count Test
The worm count test is one of the simplest yet most revealing ways to gauge soil health. Earthworms are nature’s own soil engineers — their presence tells us that the soil is alive, well-aerated, and rich in organic matter.
To carry out the test, dig up a spade’s depth of soil from your garden and gently sift through it, counting how many worms you find. If you see ten or more worms in a single spadeful, it’s an excellent sign that your soil ecosystem is thriving.
Earthworms play a crucial role in aerating the soil as they tunnel, creating channels that allow air, water, and nutrients to move freely. Their castings (worm droppings) are a natural form of fertilizer, packed with nitrogen, phosphorus, and potassium — key nutrients for healthy plant growth. Worms also help break down organic material, turning fallen leaves and compost into rich humus that improves soil texture and water retention.
A lack of worms, on the other hand, often signals compacted, acidic, or chemically treated soil that lacks organic matter. By encouraging worms through the addition of compost, mulch, and reduced tilling, you nurture a balanced, living soil that supports stronger plants and a resilient garden ecosystem.
The Soil pH Test
Testing your soil’s pH level is one of the most valuable checks you can make to understand how your garden functions below the surface. The pH test measures the acidity or alkalinity of your soil on a scale from 0 to 14, with 7 being neutral. Most plants thrive in a slightly acidic to neutral range — typically between pH 6 and 7.5.
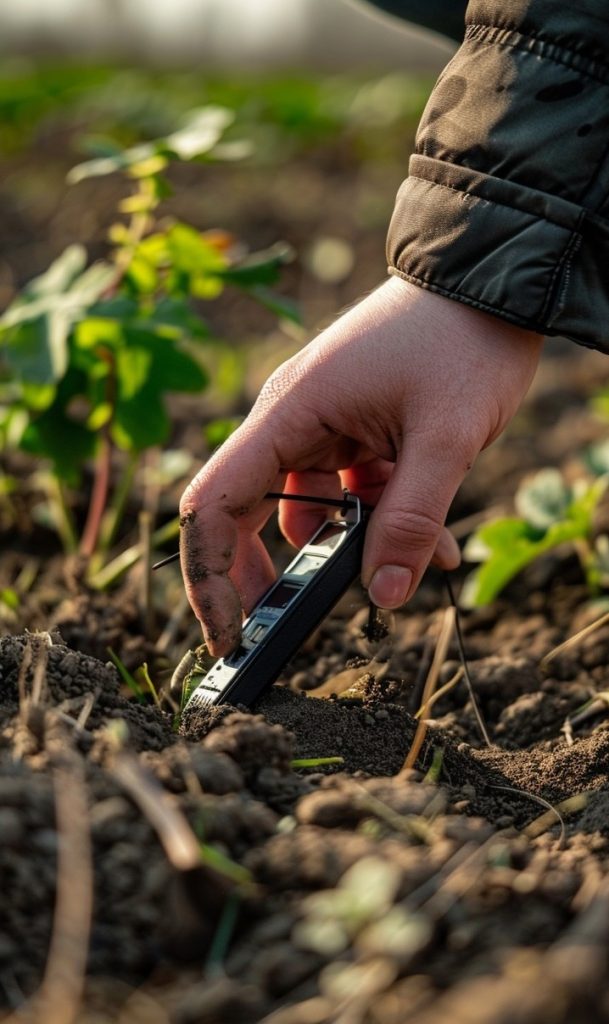
How to Test your Soil’s pH level?
There are several ways to test your soil’s pH level. A digital pH test works by measuring the hydrogen ion concentration in a moist soil sample and this will give you an accurate reading of your soil’s pH. Another easy method is using a soil test kit with litmus paper, which can be bought from most garden centres. This will give you a good idea of your soil’s pH level, and then there is an easy DIY Soil pH test using vinegar and baking soda which will also indicate whether your soil is acidic, alkaline or somewhere in the middle.
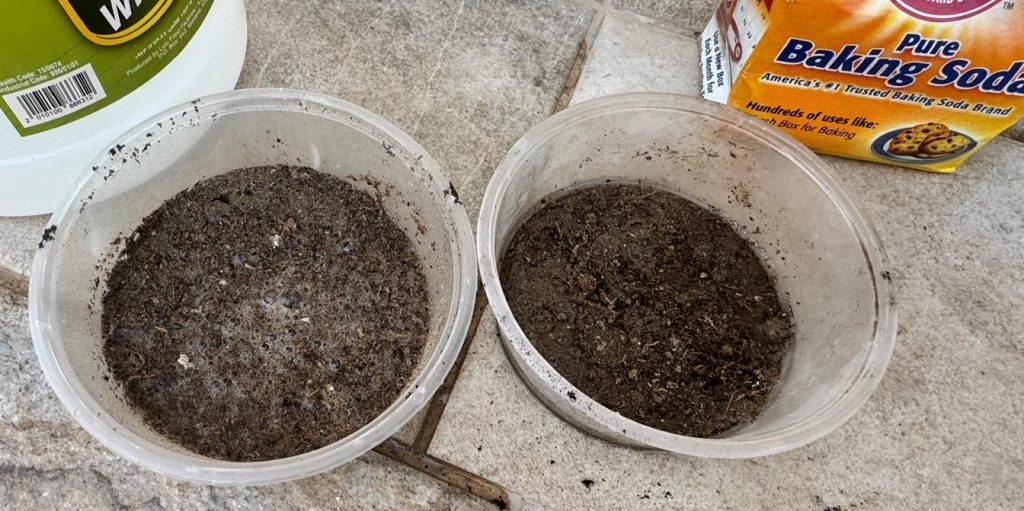
Easy DIY Soil pH Test Using Vinegar and Baking Soda
This homemade test helps you estimate whether your soil is acidic, neutral, or alkaline — using only common household items. It won’t give an exact pH number, but it gives a quick visual indicator of where your soil stands on the pH scale.
What You’ll Need
Two clean containers or small bowls
About 2 tablespoons of soil from your garden
White vinegar
Baking soda (sodium bicarbonate)
A little distilled water (tap water can slightly alter results)
How to Do It
Step 1: Prepare two soil samples
Take two separate spoonfuls of your soil and place them in separate containers.
Remove any stones, leaves, or debris.
Step 2: Test for alkalinity (using vinegar)
Pour about ½ cup of white vinegar over the first soil sample.
Watch closely — if the soil fizzes or bubbles, your soil is alkaline (pH likely above 7).
This happens because vinegar (an acid) reacts with alkaline substances in the soil, releasing carbon dioxide.
Step 3: Test for acidity (using baking soda)
In the second container, add distilled water to make the soil muddy.
Then sprinkle ½ tablespoon of baking soda over the top.
If it fizzes or bubbles, your soil is acidic (pH likely below 7).
The baking soda (a base) reacts with acidic soil, producing fizzing as carbon dioxide gas forms.
Step 4: No reaction?
If neither test produces any fizzing, your soil is likely close to neutral (pH around 7).
What the Results Tell you
Acidic soil (pH below 7) → ideal for plants like blueberries, azaleas, and camellias.
Neutral soil (pH around 7) → great for most vegetables, herbs, and flowers.
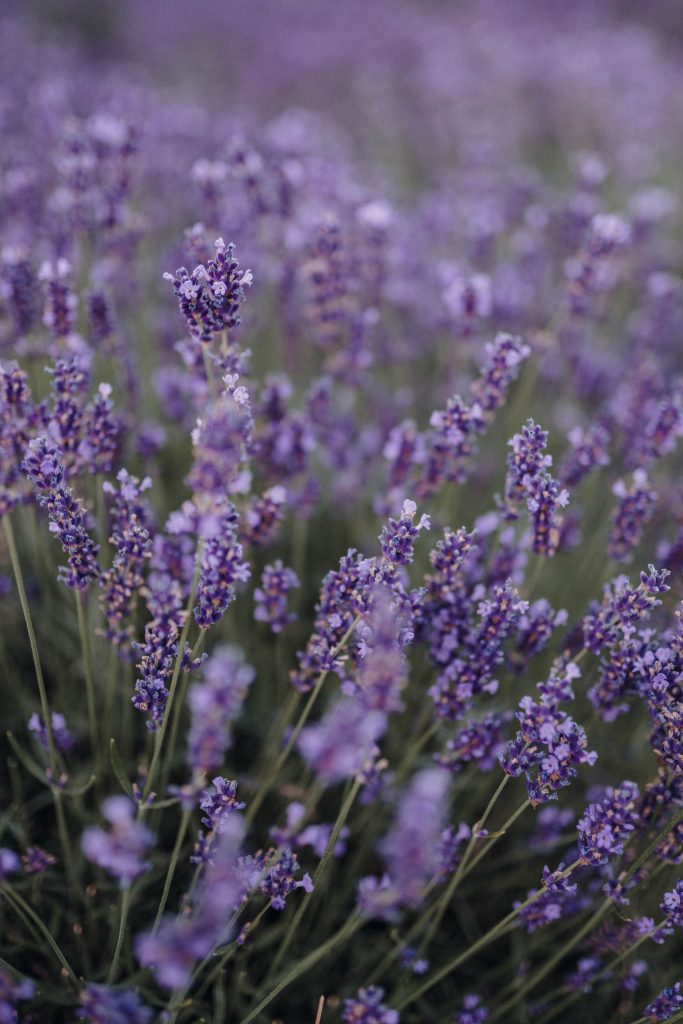
Alkaline soil (pH above 7) → better for plants like lavender, clematis, and lilac.
Why This Matters
Soil pH affects how easily plants can access nutrients.
In acidic soils, calcium, phosphorus, and magnesium become less available.
In alkaline soils, iron and zinc are less accessible — leading to yellowing leaves and poor growth.
Knowing your soil’s tendency allows you to adjust naturally:
Add garden lime or wood ash to raise pH (reduce acidity).
Add sulphur, peat moss, or compost to lower pH (reduce alkalinity).
How to Test Soil pH Using Litmus Paper
There are various different tests using litmus paper available from most garden centres and they all come with a colour chart. The instructions may differ from one to the next but they all work on the same principal – by testing your soil using the litmus paper to indicate the pH reading and then comparing the colour against the colour chart to indicate your soil’s acidity..
Garden centre tests will have their own instructions to follow – but if you just have the litmus paper then this is what you’ll need:
A few strips of litmus or pH test paper (they come with a colour chart)
Distilled water (avoid tap water because it can alter results)
A clean container or glass jar
A spoonful or two of soil from your garden
Step-by-Step Instructions for the Litmus Test
Collect your soil sample
Take a few spoonfuls from about 10–15 cm (4–6 inches) deep.
Remove stones, sticks, and leaves.
Make a soil slurry
Place the soil into a small container.
Add distilled water (roughly equal parts soil and water).
Stir well and let it sit for about 15–30 minutes to allow particles to settle.
Test the liquid
Dip a strip of litmus or pH test paper into the clearer liquid at the top of the mixture (not directly into the mud).
Hold for a few seconds until it changes colour.
Compare the colour
Match the strip’s colour to the chart provided with the paper.
The shade will tell you if your soil is acidic, neutral, or alkaline.
Interpreting the Results
Red / orange / yellow → Acidic soil (pH below 7)
Green → Neutral soil (around pH 7)
Blue / purple → Alkaline soil (pH above 7)
Tips for Accuracy
Always use distilled water, not tap water.
Test two or three samples from different parts of your garden to get an average reading.
For ongoing tracking, note down your pH readings each season.
What the Results Tell you:
The results reveal how nutrients behave in your soil:
Acidic soil (below 6) can lock up essential nutrients like calcium and magnesium, while encouraging weeds such as moss or sorrel.
Alkaline soil (above 7.5) can restrict iron, phosphorus, and manganese, leading to pale leaves and poor flowering.
Neutral soil offers the most balanced environment for nutrient uptake and healthy root systems.
Understanding your soil’s pH allows you to adjust conditions naturally — by adding lime to raise pH in acidic soils or incorporating organic matter like compost, sulfur, or peat to lower pH in alkaline ones. Regular testing ensures you’re maintaining an optimal balance, creating a more resilient, nutrient-rich growing environment for your plants.
The Soil Nutrient Test
A soil nutrient test helps determine the levels of the three primary nutrients plants need most — nitrogen (N) for leafy growth, phosphorus (P) for strong roots and flowering, and potassium (K) for disease resistance and overall vigor. Some tests also measure secondary nutrients like calcium, magnesium, and sulfur. These tests can be bought from some garden centres and are available either as a digital test meter or using a similar system to the soil acidity test, with test tubes and litmus paper to compare results with. They are an easy way to test your soil’s nutrients. The digital versions offer more precision and for more in depth tests, samples can also be sent off to laboratories.
For most home gardeners a simple digital test meter or manual test reveal enough information to be able to check the nutrient load in the soil. To perform a manual nutrient test, a small soil sample is mixed with a testing solution or placed into a test kit that reacts chemically to reveal nutrient levels through colour changes.
Understanding your soil’s nutrient profile helps you make informed choices about fertilizers, compost, and soil amendments, preventing both underfeeding and nutrient overload. For instance, low nitrogen can explain slow growth or pale leaves, while excess phosphorus can inhibit other nutrient uptake. Regular testing — ideally once or twice a year — ensures your soil remains balanced, fertile, and healthy, supporting vibrant plant life and sustainable gardening practices.
Understanding Soil Nutrient Deficiencies
Even healthy-looking soil can lack key nutrients. Each nutrient plays a specific role in plant growth, and when one is missing or out of balance, plants show visible signs.
Soil Nutrients Guide
Use this guide to identify common deficiencies and help restore your soil’s vitality.
🟣 Phosphorus (P)
For healthy roots, flowers and fruit
Symptoms: Purplish leaves, poor flowering, slow growth, weak roots.
Causes: Cold or compacted soil, or acidic soil – low pH, overuse of nitrogen blocks phosphorus availability
Fix: Apply bone meal or rock phosphate or balanced organic fertiliser .
🟠 Potassium (K)
For strength, disease resistance, water regulation and fruit quality
Symptoms: Brown or yellow leaf edges, weak stems, easily affected by pests and drought.
Causes: Sandy soils or overwatered soils which causes nutrient imbalances such as high calcium or magnesium which blocks potassium uptake.
Fix: Add kelp meal, wood ash (lightly), or sulphate of potash.
⚪ Calcium (Ca)
For strong cells and healthy root and leaf growth
Symptoms: Distorted young leaves, Blossom end rot, weak stems and stunted growth.
Causes: Acidic soil -low pH, inconsistent watering, lack of lime or gypsum.
Fix: Add lime, gypsum (for non acidic soils), or crushed eggshells
🩶 Magnesium (Mg)
For vibrant green, healthy leaves
Symptoms: Yellowing between veins on older leaves whereas new leaves remain green, older leaves may curl and drop prematurely.
Causes: Acidic soil, excess potassium or calcium blocks absorption of magnesium.
Fix: Use Epsom salts or dolomitic lime.
🟤 Iron (Fe)
For lush and strong new growth
Symptoms: Yellow new leaves with green veins, more visible in new leaves.
Causes: Alkaline soil – high pH, too much lime, poor drainage or compacted soil with reduced oxygen.
Fix: Lower pH or use iron chelates supplements
🟡 Sulphur (S)
For steady growth and rich colour
Symptoms: Uniform yellowing of new leaves, slow growth.
Causes: Soils low in organic matter, sandy soils or well-draining soils, also air pollution controls reducing natural sulphur deposition .
Fix: Add compost or gypsum or organic fertilisers container sulfur.
🟩 Nitrogen (N)
For strong, lush, leafy green growth
Symptoms: Yellowing of lower leaves, slow growth.
Causes: Soils low in organic matter, or after heavy rainfall which washed nutrients away, or due to excess carbon mulch.
Fix: Add well rotted compost, manure, or nitrogen rich fertilisers such as fish emulsion.
Organic Matter
The Secret To Living Soil
Organic matter improves structure, holds moisture, and feeds soil organisms like worms and microbes. Compost, leaf mould, and manure help nutrients stay available to plants. Regularly adding organic material is one of the simplest and most effective ways to build soil fertility long-term
Soil pH Balance
For nutrient availability and overall health
Soil pH affects how easily plants can absorb nutrients. Most garden plants prefer slightly acidic to neutral soil (around pH 6–7). If soil is too acidic or alkaline, even rich soil can cause nutrient lockout. Testing and adjusting pH helps your plants make the most of the nutrients you’ve worked to provide.
The Importance of Soil Health and Soil Quality
Why Soil Quality Matters
- Good soil holds water without becoming waterlogged.
- It contains the right balance of sand, silt, and clay.
- Healthy soil is alive with microbes, worms, and nutrients.
- Poor soil can stunt plant growth — but with the right care, even the toughest soil can eventually be improved.
Supports plant growth: Healthy soil provides essential nutrients, water, and air for strong roots.
Encourages biodiversity: Good soil teems with earthworms, fungi, and microbes that keep the ecosystem balanced.
Improves water retention and drainage: Well-structured soil holds enough moisture for plants without becoming waterlogged.
Reduces the need for chemicals: Nutrient-rich, living soil naturally supports plant health, reducing reliance on fertilizers and pesticides.
Boosts carbon storage: Healthy soil captures and stores carbon, helping to combat climate change.
Builds resilience: Plants in healthy soil are more resistant to drought, pests, and disease.
Soil Solutions
Fixing Common Soil Garden Problems
Discover simple ways to improve heavy clay soil, sandy or waterlogged soil for healthier plants and easier gardening. A simple guide to soil types & improving garden soil.

Match Plants to Soil Type
Once you know your soil type, you can make better choices about what to plant, for example:
Acidic soil → suit plants like Rhododendrons, Azaleas, Peiris, Camellias, Heathers.
Clay Soil → Roses, Daylilies, Hostas, Hrdy Geranium, Bergenia.
Sandy Soil → Lavender, Thyme, Sedum, certain Ornamental Grasses, Sage, Rock Rose
Boggy Soil → Irises, Gunnera, Astilbe, Hostas, Arum Lily.
Dry/Rubble Soil → Mediterranean herbs, Echinacea, Ornamental Grasses, Lavender.
✨ Ready to Start Growing? ✨
Browse ideas for what plants to grow in your soil, garden terraces, raised beds, garden design and more…